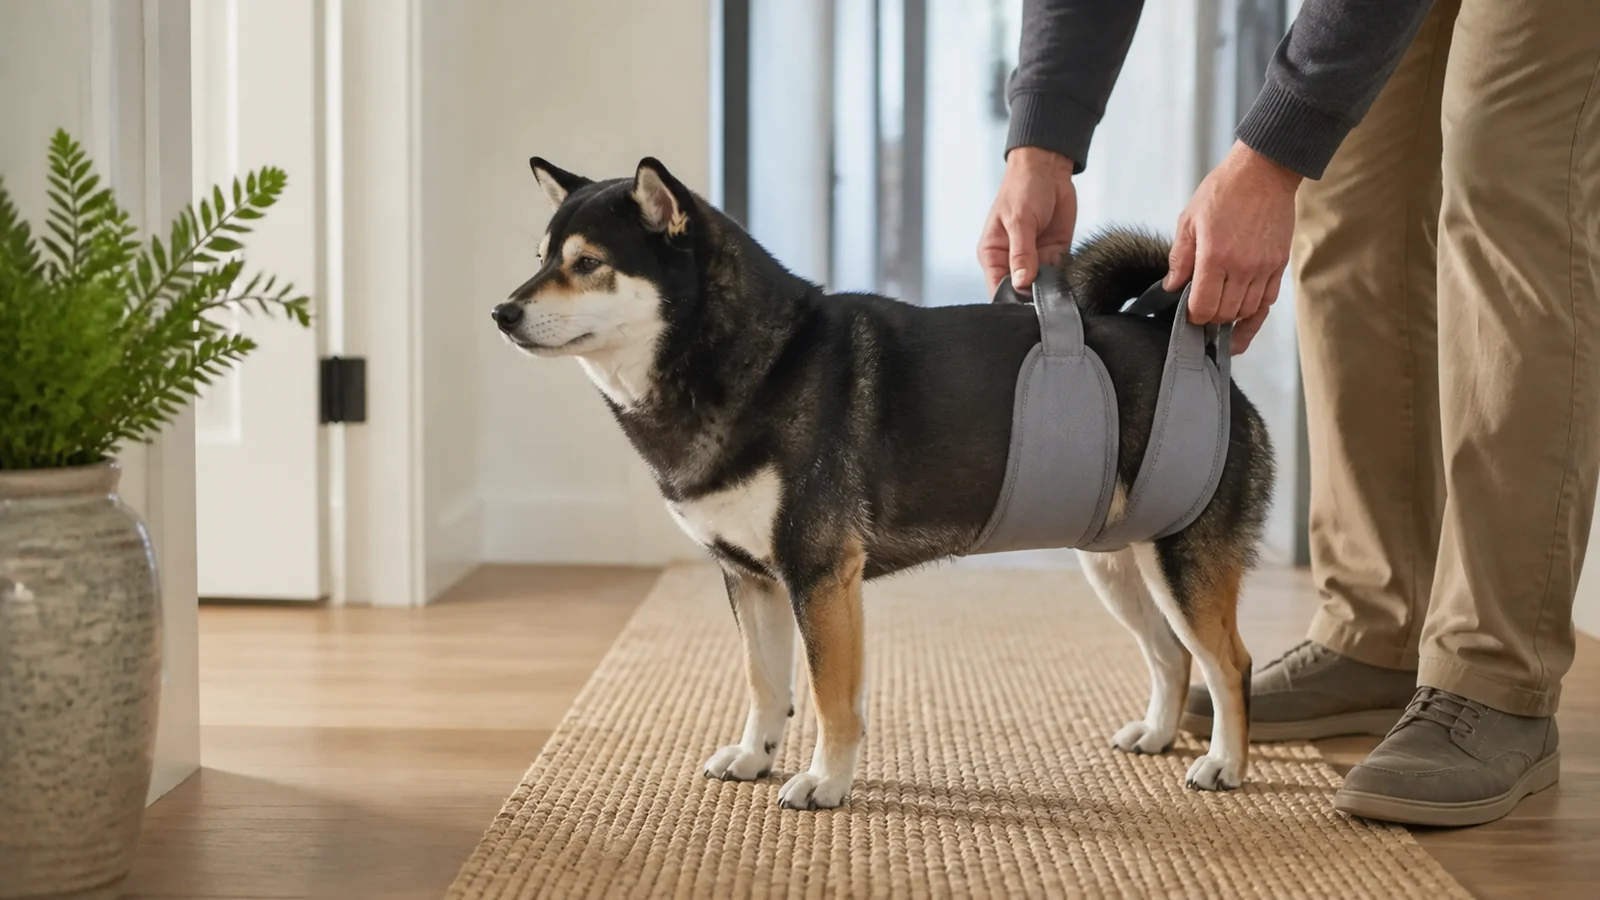
The best mobility harness for a dog with weak back legs is the least complicated support that safely completes the veterinarian-cleared task. A wide rear sling can help with a brief toilet trip or standing transition. A full-body harness can distribute support across chest and pelvis for repeated transfers. Neither should suspend the dog, compress the abdomen, rub skin, or replace diagnosis and rehabilitation.
Quick read
Quick answer
- Sudden weakness, inability to stand, severe pain, collapse, loss of bladder control, or rapidly changing gait needs prompt veterinary attention.
- Choose rear-only support when the front legs are reliable and the task is brief; choose full-body support when both ends or repeated transfers need control.
- Measure at the exact points specified, including chest, waist, and body length when required.
- Keep the spine approximately level, the paws in contact with the floor, and the handler upright rather than twisting under load.
- Check skin, fur, genitals, abdomen, straps, and gait after every early session.
Start with the medical and movement problem
Weak back legs can arise from orthopedic pain, neurologic disease, injury, surgery, muscle loss, or other conditions. Cornell's osteoarthritis overview explains that stiffness, gait change, trouble rising, and difficulty with stairs or furniture deserve veterinary assessment. UC Davis's Sports Medicine and Rehabilitation Service describes rehabilitation as an individualized plan to restore mobility and function after appropriate examination.
VCA's multimodal pain-management guidance includes fabric slings and support harnesses among possible assistive devices, alongside non-slip floors, restricted stair access, and individualized treatment. The harness is therefore a tool inside a plan, not the plan itself.
Share & embed
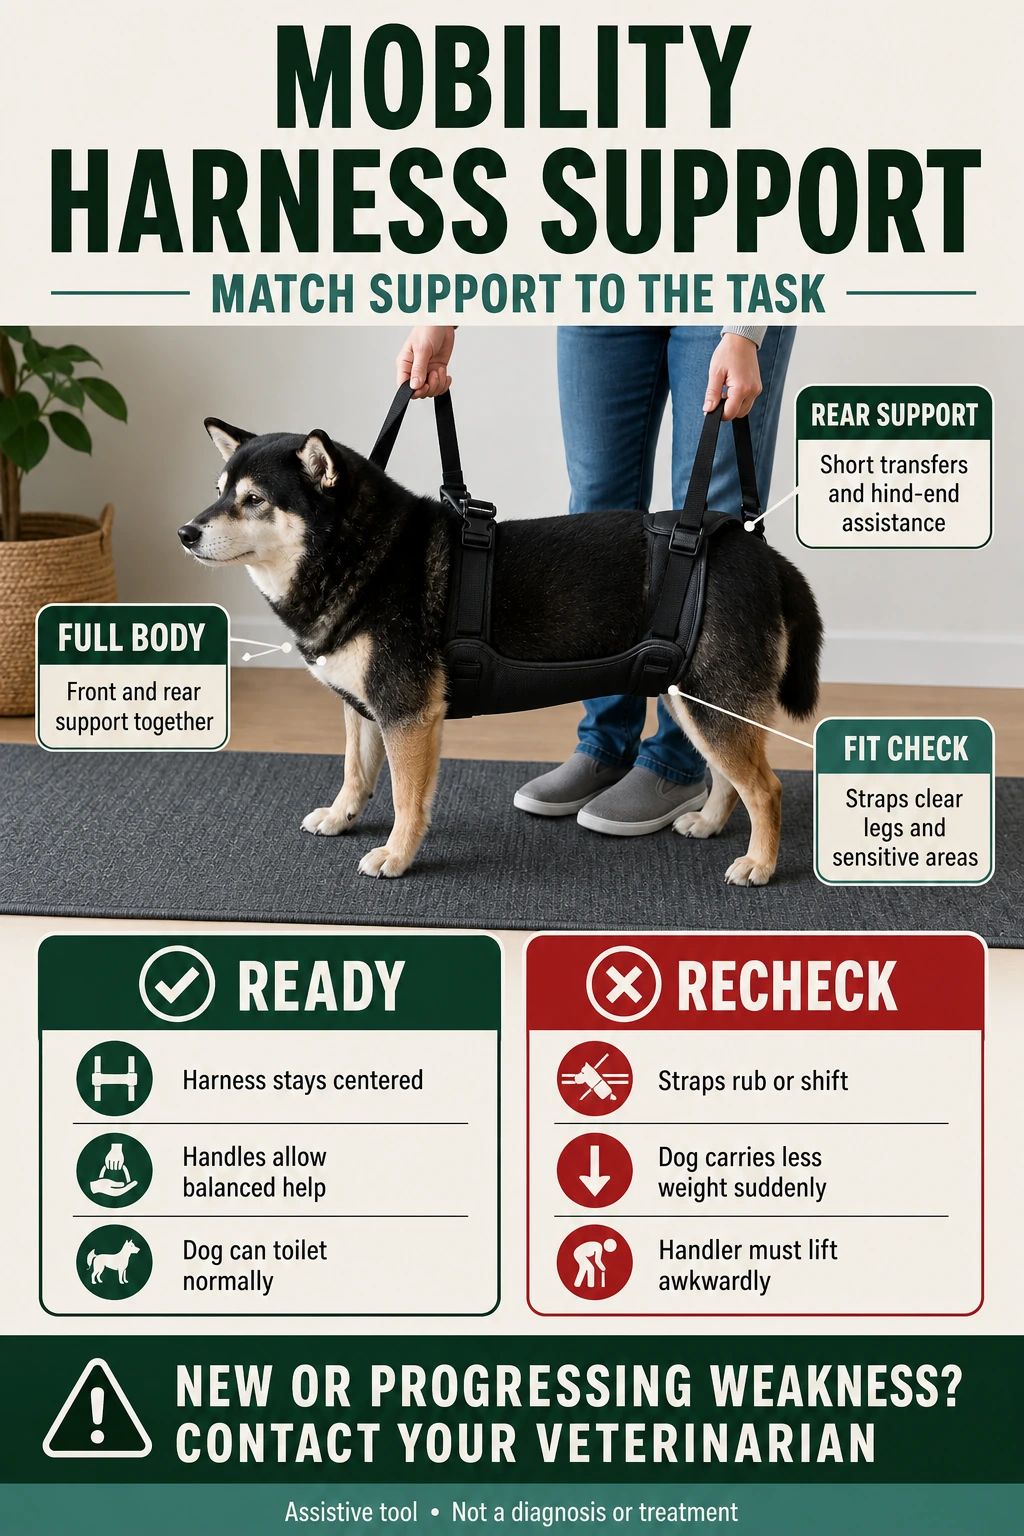
Rear sling vs full-body harness
Brief toilet support
Front legs and trunk remain reliable
- Look for
Wide rear sling with long adjustable handles
- Avoid
Narrow strap under soft abdomen
Standing from a bed
Dog needs lift at pelvis and stable front footing
- Look for
Rear sling plus non-slip path
- Avoid
Pulling upward before paws are positioned
Repeated vehicle or stair transfer
Need coordinated front and rear control
- Look for
Full-body harness cleared by vet/rehab team
- Avoid
One-handle lift that tilts the spine
Post-surgery use
Load and range may be restricted
- Look for
Exact clinician instructions and compatible harness
- Avoid
Generic exercise or stair practice
| Support type | Best for | Advantage | Tradeoff | Critical fit check |
|---|---|---|---|---|
Rear sling | Brief hind-end assistance with strong front limbs | Fast to position; keeps front end independent | Can slide, bunch, or press abdomen/genitals | Wide support under pelvis; spine stays level |
Rear harness | Regular hind-end help and adjustable fit | More repeatable placement than a loose sling | More straps and contact points | Leg openings, waist range, toileting clearance |
Full-body harness | Front and rear support or repeated transfers | Two support zones and better body control | More fitting complexity and potential rubbing | Chest, pelvis, spine line, handle balance |
Wheelchair or cart | Longer mobility when professionally selected | Allows locomotion beyond hand-supported steps | Requires fitting, conditioning, and skin care | Veterinary rehab assessment and serial rechecks |
A rear sling belongs under the pelvis or manufacturer-specified support zone, not pulled into the soft belly. Male dogs need urethral and genital clearance. Female dogs need unobstructed toileting. Move the sling away for elimination if required, then refit before walking.
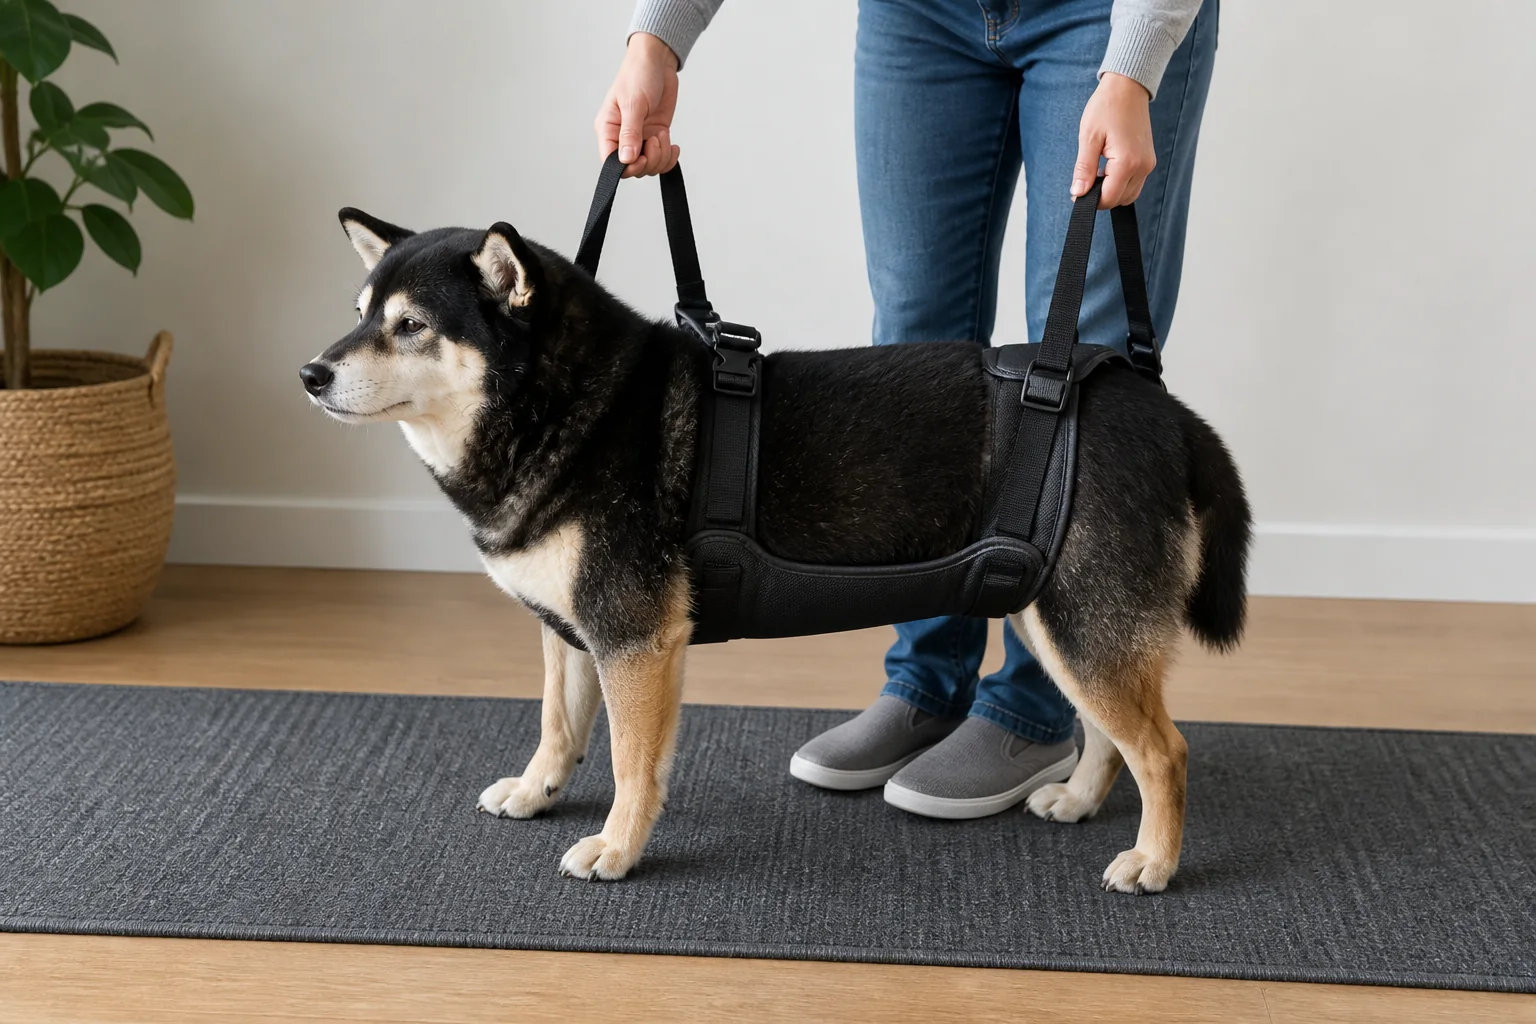
A full-body harness should distribute assistance without tightening around the neck or armpits. Front and rear handles need to lift together so the dog remains level. The best design on paper can be wrong for a deep chest, short torso, incision location, incontinence, or one-sided weakness.
Two current Amazon options
These products represent an adjustable rear harness and a simple wide sling. We have not assessed them on an individual patient. Obtain veterinary or rehabilitation guidance, then verify the current chart, placement instructions, chosen size, seller, and returns.
Measure and test without rushing
Use a soft tape at the points shown in the current product diagram. Do not substitute breed or weight for chest and waist measurements. Record whether the dog is male or female, where the weakest point lies, the incision or sore locations, and whether a diaper must fit beneath the device.
Lay out the straps and identify front, rear, inside, and handle path before approaching the dog. On a non-slip rug, place all paws squarely. Apply only enough lift to reduce buckling while the paws still bear the amount of weight prescribed. Watch the spine from the side; the pelvis should not be hoisted higher than the shoulders.
The handler should shorten or lengthen handles to stay upright with elbows softly bent. Twisting while lifting a large dog can injure both partners. Use two adults for stairs, vehicles, or any dog beyond one person's safe control. A proper SUV ramp may reduce the height of a cleared vehicle transfer, but it still needs a second person and calm training for a weak dog.
A skin and function log
For the first week, note the task, support duration, number of steps, slips, toe scuffing, urination or defecation, and behavior after the session. Photograph strap placement for your veterinary team without assuming a photo replaces examination.
After each use, check the armpits, sternum, abdomen, groin, thighs, tail base, and every strap edge. Look for redness, heat, dampness, hair loss, swelling, odor, urine exposure, or pressure marks that persist. Wash and dry the device according to instructions; a damp padded harness can macerate skin.
Stop and contact the veterinarian if weakness progresses, the dog cries, pants unusually at rest, knuckles paws, drags toes, cannot urinate, loses continence unexpectedly, develops a sore, or needs steadily more lift. Do not add exercises, stairs, or longer walks because the harness makes them physically possible.
Home setup around the harness
Create a continuous non-slip route from the senior dog bed to water and the toilet area. Gate stairs when unsupervised. Keep nails and paw fur maintained, remove trip hazards, and place the harness where it can be applied before the dog struggles to stand.
Coordinate rest surfaces with access. Dog steps for a high bed are only appropriate when the dog's movement supports steps; many weak dogs need a ramp, floor-level bed, or blocked furniture access instead.
Rehearse the human side of the transfer
Before lifting the dog, walk the route and open every door. Move rugs that curl, place the destination bed, and make sure a second adult knows which handle to take. Count down together so front and rear support begin at the same time. The dog's feet should not swing into furniture or a door frame.
For a vehicle, park on level ground and prepare the ramp before bringing the dog outside. For toilet trips, have bags, light, and the return path ready so the dog is not held in the sling longer than necessary. If the handler has back, shoulder, balance, or grip limitations, tell the veterinary rehabilitation team; the correct plan must be physically possible for both partners and may require a different device or two-person assistance.
Wash hands and the sling after urine, feces, wound drainage, or topical medication contacts the fabric. Keep a second clean support device if the dog depends on one while the primary harness dries fully.
Choose wear time before choosing the product
“Easy to leave on” is not automatically a benefit. Start by listing when assistance is actually needed: rising from bed, a toilet trip, a short rehabilitation walk, stairs that cannot be avoided, or a vehicle transfer. Then estimate how long the device touches the dog for each task. A simple rear sling may be easier to remove between brief toilet trips; a fitted full-body system may provide more repeatable placement for several coordinated transfers.
Continuous wear changes the buying criteria. The dog must be able to lie down without buckles under pressure points, urinate and defecate without contamination, and move without straps migrating into the armpits, groin, genitals, or incision. Handles cannot trail where they snag on furniture. Even when a manufacturer permits longer wear, the veterinary plan should define removal, skin checks, sleep, toileting, and supervision.
Do not select an all-day device merely because repeated fitting is difficult for the handler. That difficulty may indicate the wrong design, strap complexity, hand strength requirement, or need for a second person. Ask the rehabilitation team to watch the handler put it on and remove it; a theoretically correct harness is not workable if safe placement cannot be repeated at home.
Use a task-based trial sheet
During the return window, test only clinician-approved tasks and record them separately. For each session note: task, surface, duration, amount of support, number of steps, whether the dog could toilet, any strap migration, skin findings, and handler effort. A product can pass standing support and fail toileting or vehicle access.
Film a short side view for the veterinary team when permitted. The spine should remain near level, paws should contact the floor as prescribed, and the handler should not need to twist, hunch, or jerk upward. Compare the first and final minute; increasing toe drag, panting, resistance, or dependence on lift is a reason to stop, not a successful endurance test.
Also rehearse removal when the dog is tired. Identify how to release straps without rolling the dog onto a painful side and where a clean dry replacement will be stored. Keep packaging until size, anatomy clearance, task performance, and handler ergonomics are all acceptable.
FAQ
These added questions reflect Reddit discussions about a rear-support harness being worn all day and a dog crying during harness-assisted stairs. Those experiences identify high-stakes questions; the answers must come from the individual dog's veterinary and rehabilitation plan.
Where should a rear support sling sit?
At the manufacturer-specified pelvic support area, wide and flat, with no pressure on the soft abdomen, genitals, incision, or sore. Ask the veterinary team to demonstrate placement for the individual dog.
Can a dog wear a mobility harness all day?
Only if the exact product and veterinary plan permit it. Continuous wear increases rubbing, moisture, snag, and toileting concerns. Early use needs frequent removal and skin checks.
Is a rear sling enough for stairs?
Not automatically. Stairs add fall risk and coordinated front-limb demand. Many dogs should have stairs gated. Use two-person assistance or another route only after professional guidance.
Can a mobility harness treat arthritis or weak legs?
No. It assists a movement task. Diagnosis, pain control, rehabilitation, exercise limits, and progression monitoring belong to the veterinarian and rehabilitation team.
What if my dog cries or resists while I use the harness on stairs?
Stop the transfer and contact the veterinary team. Crying can reflect pain, pressure, fear, fatigue, or unsafe technique; it should not be treated as a training problem to push through. Gate the stairs and create a same-level rest and toilet plan until the movement has been reassessed.
Is a rear sling or full-body harness better for getting into a car?
It depends on which body regions remain reliable and how the dog will contact the ramp or vehicle. Rear-only support assumes safe front-limb control. A full-body system offers two support zones but is more complex. The clinician should define load, while the handler proves the complete route on level ground with a second adult.
How often should I remove an all-day mobility harness?
Use the manufacturer instructions and the veterinary plan, not a universal interval. Early use requires frequent removal for skin, moisture, strap migration, toileting, and behavior checks. Remove it immediately for rubbing, swelling, dampness, contamination, breathing restriction, distress, or a change in gait.
Bottom line
Choose the support that matches one clearly defined task, fit it around the dog's anatomy, keep the body level, protect the handler, and inspect after use. When weakness changes, reassess the medical plan before changing the product.