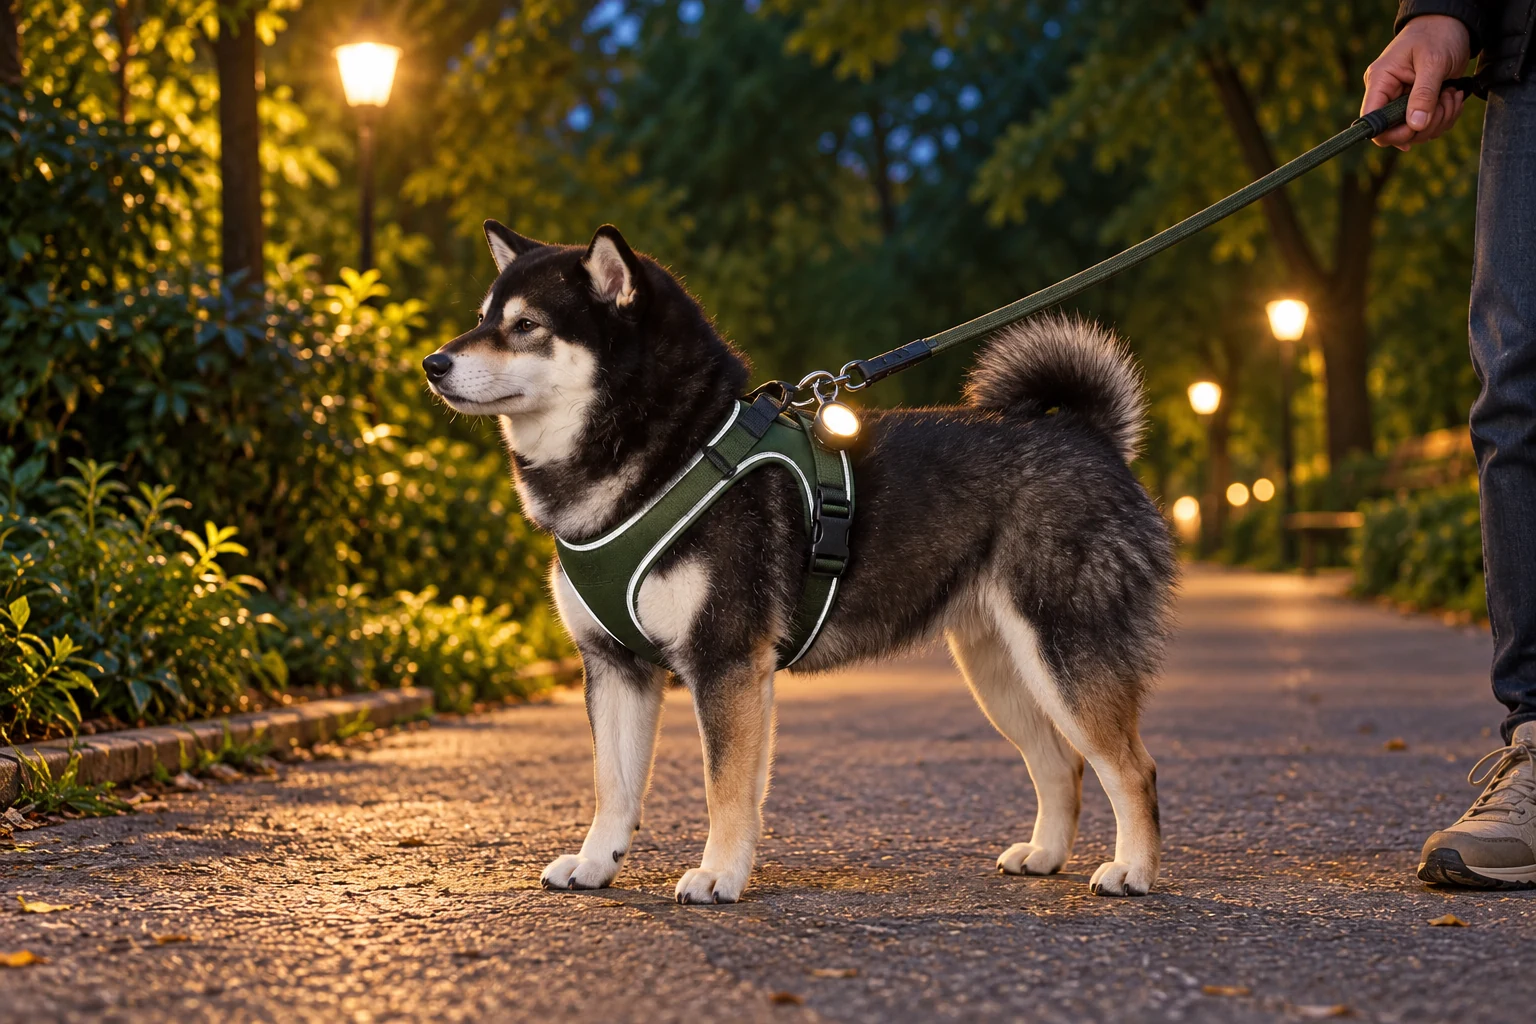
Useful reflective dog gear adds visibility to the harness, collar or leash you already trust. Start with a route away from moving vehicles, then check whether the dog can be seen from the front, rear and both sides. Reflective material, a powered dog light and a flashlight for your own footing each do a different job. Even a very bright collar light may leave the ground hard to see.
Quick read
Choose your night-walk setup
- For lit neighborhood walks, add visible reflective coverage and check that fur does not hide it.
- For dark paths, add a charged dog light and carry your own path light.
- Keep lights separate from the load-bearing leash attachment unless the manufacturer explicitly designed that connection.
- Check the complete setup with the dog moving, turning and wearing any coat.
- Shorten or change the route if lighting, footing or traffic makes it difficult to keep control.
Reflective, fluorescent and illuminated gear solve different problems
Reflective trim needs incoming light to stand out. A powered LED produces its own light, while a bright daytime color helps contrast when there is enough ambient light to see it. A fluorescent orange vest is not automatically an illuminated vest, and a glowing collar is not automatically a leash collar.
NHTSA's pedestrian visibility guidance distinguishes retroreflective materials from active illumination. Although that guidance concerns people, the distinction helps explain product labels. Check whether an item reflects incoming light, produces its own light or only has a bright daytime color.
| Gear type | Main job | Useful when | What it cannot do | Check before buying |
|---|---|---|---|---|
Reflective harness or vest | Returns incident light | Headlights or another light reach the dog | Generate light on an unlit trail | Coverage on both sides and rear; fur and coat interference |
Clip-on LED | Adds an independent light source | You need to locate the dog in darkness | Light every walking surface or replace restraint | Secure mount, battery routine and visibility around the body |
Light-up necklace | Creates a ring of light around the neck | A necklace remains visible above the coat | Act as a load-bearing collar unless explicitly designed for that purpose | Correct cut-to-fit range, charging port and separate leash collar |
Handler headlamp or flashlight | Shows the path and obstacles | Pavement, roots or waste are hard to see | Make a hidden dog light visible from every direction | Beam placement and handling while holding the leash |
Build the setup around the route
An evening toilet break on a well-lit sidewalk does not need the same equipment as a long walk on an unlit rural path. Write down the two or three problems you actually encounter before comparing product listings: a black dog disappearing against a hedge, an owner stumbling on uneven pavement, or a collar light disappearing under a winter coat.
For a neighborhood route, prioritize predictable leash control and clear crossings. On a dark park path, your own light needs to reveal the ground as well as the dog's position. If a rural road has no safe walking space, find another route before shopping for accessories.
NHTSA's pedestrian safety advice recommends sidewalks where available and attention to traffic at crossings. Keep that route planning separate from product claims. No dog accessory in this guide has been shown by us to prevent a collision.
Lit sidewalks
Dog and handler usually remain in ambient light
- Look for
Reflective coverage plus an optional light
- Avoid
Replacing a secure walking harness just for bright trim
Dark park paths
You need to see the dog and the surface
- Look for
Dog light plus a handler path light
- Avoid
Using a small collar LED as the only flashlight
Long or thick fur
Collar disappears below the coat
- Look for
Mount visible above fur on compatible gear
- Avoid
Assuming a glowing ring shines through every coat
Wet winter walks
Extra layers and frequent washing
- Look for
Check coat, mount, weather instructions and charging routine together
- Avoid
Hiding the only reflective patch beneath a coat
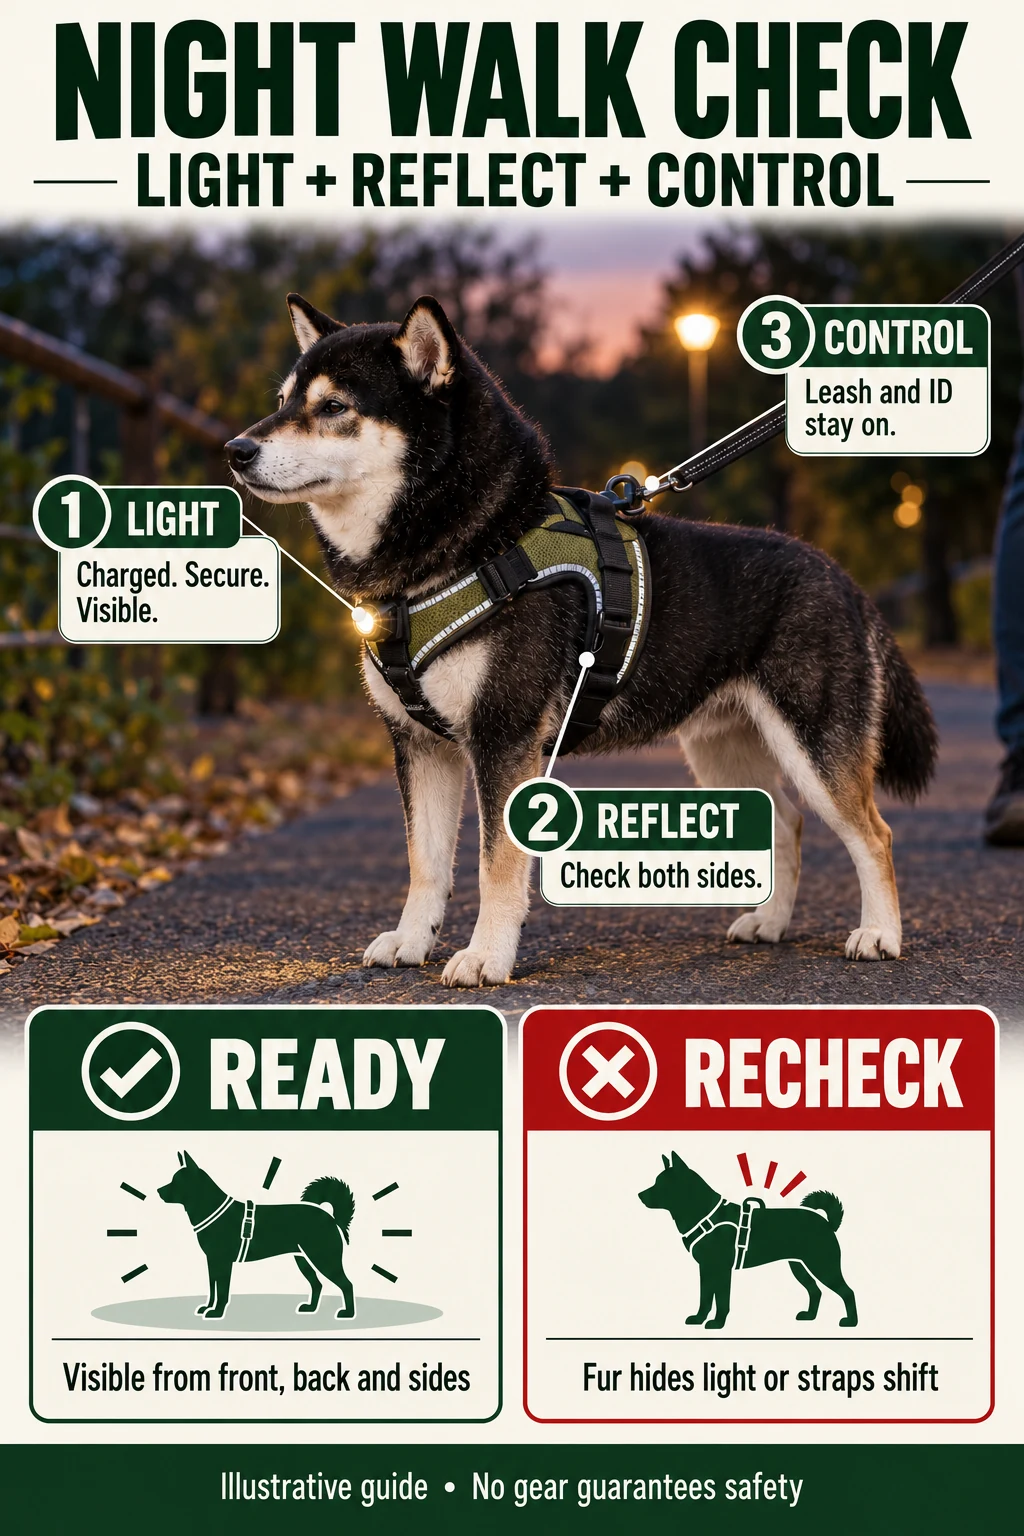
Use the front, back and sides check
Share & embed
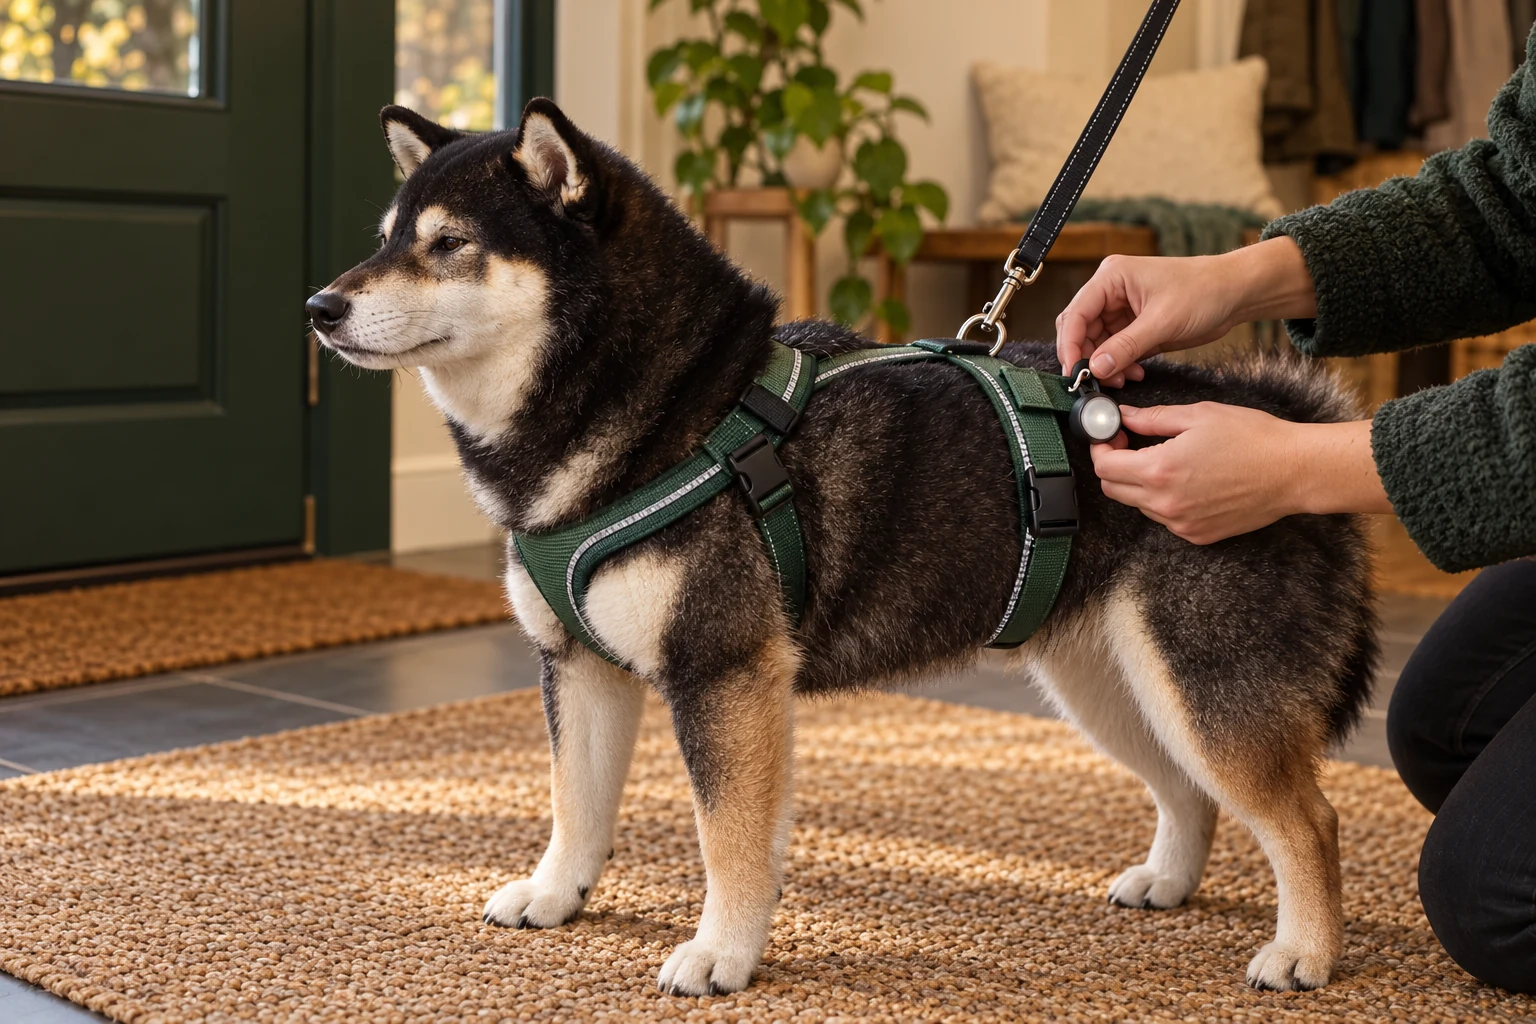
Do this in a secure yard, hallway or other controlled space. Have another adult hold the dog on its ordinary leash while you look from several directions. Check the standing dog, then ask for a turn and a few steps. A light that faces you while the dog sits may point into the fur once the dog starts sniffing.
Use a normal flashlight to inspect reflective areas. This can reveal coverage gaps, although it cannot establish how far a driver will see your dog. Repeat the check with the coat, pack or rain layer the dog will actually wear.
If a patch disappears, move the accessory only to a mounting point the manufacturer permits. Do not tighten the collar excessively, shave fur, or add loose cords to improve the view. A wider visible surface on another suitable item may solve the problem more simply.
Choose a mount before choosing a brightness claim
A light has to stay attached when the dog shakes, turns its head and brushes past your leg. Check the fastening method against the exact strap width, thickness and orientation. A clip that works on a flat harness light loop may not fit a thick round collar. A ring may hang too low and repeatedly strike an ID tag.
Keep the load path clear. The leash needs a proper attachment on a correctly fitted walking collar or harness. An accessory clip, silicone loop or light housing should not become part of that connection. Avoid piling accessories onto the leash gate if they prevent it closing fully or make the connection difficult to inspect.
Consider noise and movement too. A dangling light can knock against tags or bounce near the face. If the dog repeatedly scratches at it, freezes or tries to mouth it, remove it and reassess the placement. A less complicated setup that the dog tolerates is more useful than several lights that cause constant distraction.
For the underlying fit, use the Dog Harness Fit Guide and Dog Collar Size Guide. Visibility accessories should fit around those decisions.
Two Amazon options for different mounting needs
A clip-on light uses compatible equipment you already own. An illuminated necklace adds a separate ring around the dog's neck. Neither adds reflective fabric to a plain leash, so keep the coverage check above. We have not tested these products ourselves; compare the mounting formats against your dog's setup.
A clip-on light for an existing harness or collar
Ruffwear describes the Beacon as a rechargeable light with clip and ring attachment options, several light modes and a waterproof construction. Look closely at the loop or ring where you plan to attach it before ordering.
A light-up necklace worn alongside a normal collar
Nite Ize's NiteHowl instructions describe a cut-to-fit illuminated necklace. The brand has regular and mini sizes, plus different generations and charging connections. The linked option is the Regular Disc-O Select version; do not transfer its fitting instructions to every NiteHowl listing.
Do not buy solely by distance or battery claims
A listing may advertise a long visibility distance without explaining weather, viewing angle, background light or how the device was mounted. Ask how the seller established that figure. It cannot tell you whether the light will remain visible under your dog's ruff.
Battery figures also depend on mode and product version. Your useful requirement is that the light covers the planned outing with reserve and can be checked before departure. If charging is easy to forget, place the cable beside the lead and make the check part of the door routine. Keep a usable reflective layer when a light is off, but do not mistake that backup for an active light on an unlit path.
Check how the button works with cold hands or gloves. A menu that is difficult to operate may lead to the wrong mode or an accidental switch-off. In a household with several walkers, agree on one normal mode and where the charging cable belongs.
A short trial before the first dark walk
- Fit the usual collar or harness without the accessory. Confirm normal movement and secure leash attachment.
- Add the light using its intended mount. Check that buckles, gates and adjusters remain accessible.
- Ask for a few steps, a turn and a sniff. Look for bounce, rubbing, hidden light or an accessory the dog can mouth.
- Inspect visibility from each direction with all expected layers on.
- Check power, button operation and the handler's own path light. Then choose a short familiar route.
Save the packaging until that trial is complete. Cut-to-fit items may have different return conditions after trimming. Test the uncut necklace according to its instructions before making an irreversible adjustment, and keep every offcut out of the dog's reach.
Wet gear and everyday maintenance
Follow the exact item's water and cleaning instructions. “Weather resistant” and “waterproof” are different claims; neither tells you how to clean a charging port full of grit. Wipe down suitable surfaces after a muddy outing, allow the device to dry as instructed, and inspect the seal or cover before charging.
Look for cracked housings, stretched mounts, damaged loops and corrosion. Remove any damaged device rather than leaving a small broken component on the dog. Reflective fabric also needs care: dirt and a folded strap can hide the area you meant to expose. Use the Dog Leash Materials Guide when choosing an easy-to-clean everyday lead, and keep a small visibility module in your dog gear bag.
Questions owners ask about night-walk gear
Owners asking about a reflective vest as backup for a battery-powered collar and a harness light that does not bounce raise practical questions about coverage and mounting. The answers below use product instructions and editorial fit checks. The discussions themselves do not establish safety or durability.
Frequently asked questions
Is reflective dog gear enough for an unlit path?
Reflective material needs a light source to become conspicuous. Add an appropriate powered light if you need to locate the dog without incoming headlights, and carry a separate light that lets you see the ground. Choose a different route if the overall conditions remain difficult.
Should I use an LED collar and a reflective vest together?
They can cover different needs, provided the combined setup fits comfortably. The vest must not hide the light or restrict the harness. Check the dog from all sides with both items on rather than assuming that two products automatically provide complete coverage.
Where should a light sit on a long-haired dog?
Use a permitted mounting point that keeps the light clear of fur during ordinary movement. A compatible harness or apparel loop may work better than a buried collar. Do not overtighten the collar or create a dangling extension to lift the light above the coat.
Can I attach the leash to a light-up necklace?
Only a product explicitly designed and rated as a restraint collar should carry leash load. The NiteHowl option here is a safety necklace, so use a separate correctly fitted collar or harness for the leash. A bright accessory is not automatically walking hardware.
What if a clip-on light keeps bouncing or falling off?
Check whether its mount fits the exact strap and orientation. Stop using an insecure mount, and avoid improvising with loose cords or a partially closed clip. Choose a compatible attachment or a different accessory format if the intended connection does not remain secure.
Is a flashing light better than a steady light?
We do not have a universal dog-product test establishing that one mode is best in every setting. Choose a mode you and the dog tolerate and that fits local conditions. If flashing is distracting or uncomfortable, compare a steady mode while retaining reflective coverage and good route planning.
Does reflective gear replace a GPS collar or ID tag?
No. Visibility, identification and location tracking serve different purposes. Keep readable ID and secure restraint. If tracking is relevant, compare coverage and subscription requirements in the GPS Dog Collar Guide; it does not replace direct control beside traffic.
What should I check before every evening walk?
Check power, mount security, clear leash hardware and visible placement with any coat on. Inspect the route and bring a path light when needed. If the light fails or the gear shifts, adjust the setup in a secure place before continuing.
Related fit and weather decisions
Start with the Harnesses, Collars & Leashes hub for the restraint itself. For dark winter outings, compare cold-weather dog gear and ensure each layer leaves the visibility setup usable. On wet walks, the dog rain gear guide helps you check coverage and harness access before adding another layer.